The Cloud Gaming phase is already behind us, and while it might seem a missed opportunity for this post, I’ll still publish it if in case anyone else wants to try it out.
There’s just a couple of requirements to get started:-
- you should have a public facing IP address – most ISPs host users behind one or two NAT layers for extra security (and also for hosting multiple clients over a single IP address) check if you are behind a NAT
- you should be able to set up port forwarding on your router – this is a fairly standard feature on most routers – you might see it under “Virtual Server” or some simpler name like “Port Forwarding” or “QoS”
Let’s start with baby steps here. We’re going to follow this step-by-step approach:-
- RDP over LAN
- RDP over WAN (internet)
- NVIDIA GameStream over LAN
- NVIDIA GameStream over LAN
- Sunshine over LAN
- Sunshine over WAN
RDP over LAN
Start with just setting up RDP on your gaming computer. if the link doesn’t work for you, try looking for another solution online. To complete this step, you should be able to use the local IP address (one that starts with 192.xxx…) to control your computer when connected to the same router.
Q: But Piyush, everytime I restart my computer the IP address of the gaming computer changes! How to fix that?
A: You can assign a static IP to your gaming computer so it doesn’t bounce around. You can assign a static IP in the router’s config menu or in your PC’s settings. I prefer setting up in the router’s config so it always points to the same gaming computer regardless of the OS I’m running or even if I re-install Windows.
RDP over WAN
Forwarding ports is risky, so make sure you have set up a password on your gaming computer before forwarding ports to it.
This one is a bit tricky. You need to forward TCP port 3389 from the router to your gaming computer. Once you do that, you can use your public IP address to connect directly to your gaming computer.
NVIDIA GameStream over LAN
Only for gaming computers with an Nvidia Graphics Card
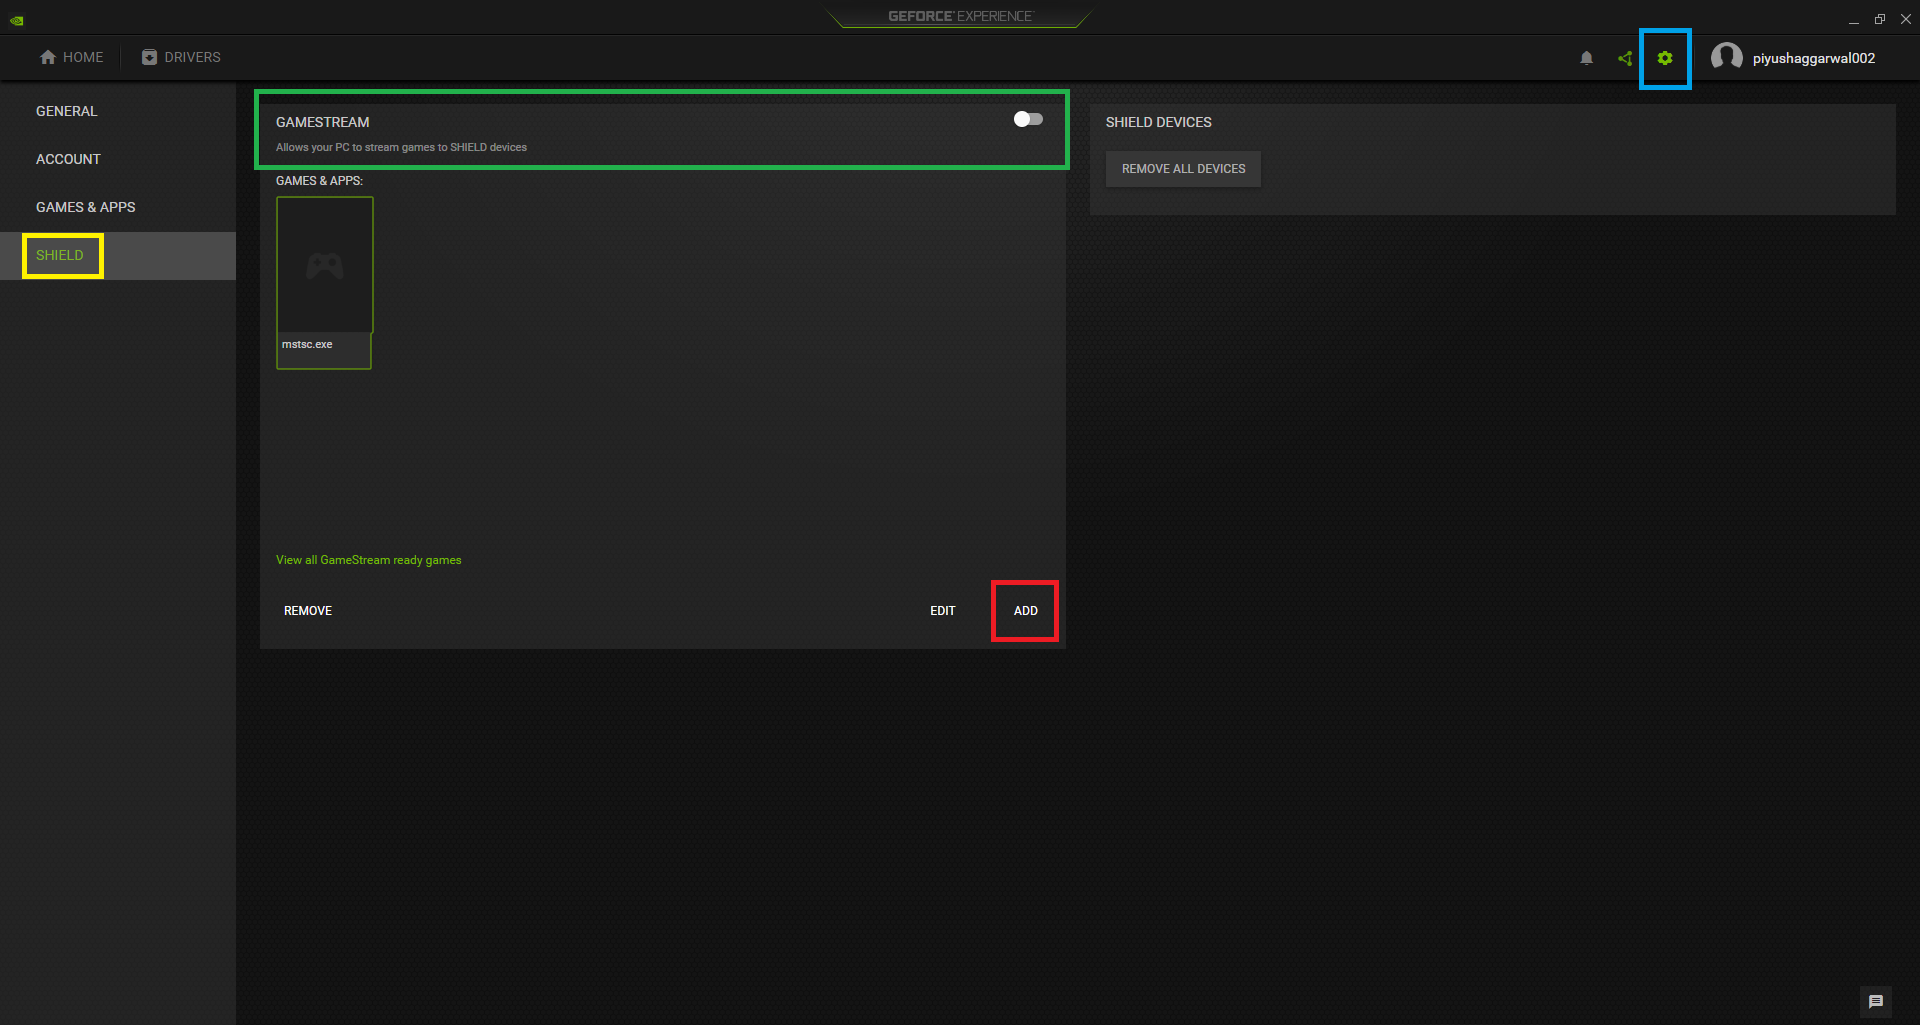
- Open NVIDIA GeForce Experience
- Go to the cog wheel (settings) icon on the top right [BLUE]
- Go to the SHIELD section in the settings (from the left sidebar) [YELLOW]
- Enable GAMESTREAM [GREEN]
- Click on ADD to add this exe ::
C:/ -> windows -> system32 -> mstsc.exe. This allows you to stream your desktop using NVIDIA GameStream.
Now, on your (let’s say Client computer, where you want to stream the games), install MoonLight. Once done, try your gaming computer’s IP address in the Moonlight app. You need to pair the two device using the PIN shown on your Client computer. Try using mstsc.exe now, it should open up the gaming computer’s desktop on your Client with minimal latency. Cool, right?!
NVIDIA GameStream over WAN
Only for gaming computers with an Nvidia Graphics Card
It’s port forwarding time again! Now that we don’t use RDP anymore, you may remove the port forwarding for Port 3389 that we added before. Here is the new list of ports to be forwarded:
TCP 35043, 47991, 47995, 47996, 47989, 47984
UDP 47999, 47992, 47998, 47989, 48000
Once this is done. you may need to re-authorize your device. On your client computer, add the public IP address of your router, pair with your computer again, and everything should just work! Congrats, now you have a working cloud gaming setup! Now, let’s make switch to a more stable alternative so it keeps working forever.
Time to go open-source! Sunshine over LAN
Disable NVIDIA Gamestream from GeForce Experience. We won’t need it anymore
Download and install Sunshine from https://github.com/LizardByte/Sunshine/releases/latest
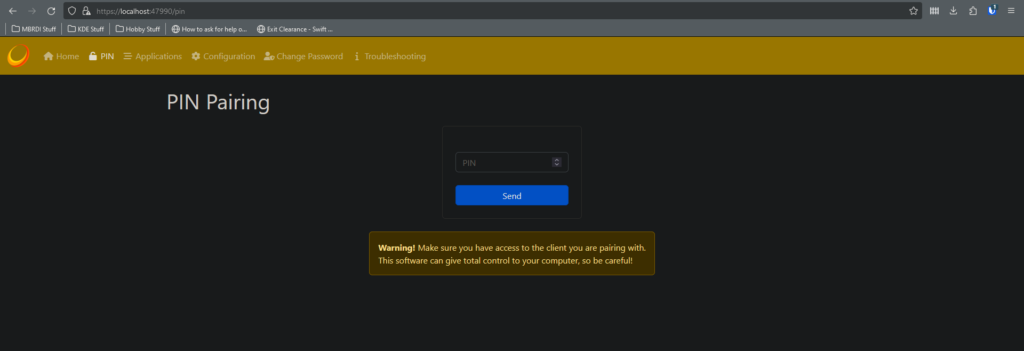
Start Sunshine on gaming computer, pair again using Moonlight on Client Computer. For pairing, you will enter the PIN on your gaming computer on this URL: https://localhost:47990/pin
Try Moonlight again, stream Desktop. Everything should look pretty smooth (maybe lower latency than GameStream).
Sunshine over WAN
Remove the port forwardiing rules for GameStream, add these instead
TCP 47984,47989
UDP 47998,47999
TCP&UDP 48010,27015,27036
Try connecting again using Moonlight, pair and start Desktop. That’s it! Congrats, you’re all set up for cloud gaming using your own hardware!
Q: But Piyush, my public IP address keeps changing! How do I fix that?
A: If your public IP address keeps changing every few minutes, you have a Dynamic IP address. The best way to fix this would be by using a dynamic DNS (DDNS). Most routers already have support for dynamic DNS, just create an account at noip.com, go to this URL to set up a dynamic DNS hostname that you like, and enter the hostname, your account username and password in your router’s settings. For your router, check this.
Q: But Piyush, I don’t have a public facing IP address. Does that mean I cannot have a cloud gaming setup?
A: You can still have this! Just read this tutorial, try the LAN ways to do this, and then look up ZTNA (Zero Trust Network Access) or specifically, ZeroTier. I’ll try to cover it in another blog post. Stay tuned!
Yeah, so that’s it! If you find any problems while setting this up, or want to thank me, feel free to shoot a mail at mail [at] piyushaggarwal [dot] in .
Cheers!